Step 2: Use SQL Developer’s Database Export wizard to export the view to your desired file format
In SQLDeveloper, Tools → Database Export
Select the correct DB connection
Uncheck ‘Export DDL’
Under ‘Export Data’ change Format to CSV or XLSX (or whatever file type is desired)
Adjust file names and output dir as desired, click Next
Uncheck all except ‘Views’, Next
Ensure that you select the correct schema selected, if the schema is not the default schema for your user, click ‘more’ – select the correct schema and change type from ‘All Objects’ to ‘View’
Click ‘Lookup’ and you will see the view you created in Step 1
Select the View and hit the blue arrow to move the view into the lower box, then click next, review and Finish.. your export will now run with a status box for the task.
We utilise the open GRC source tool, Eramba; some instances of which are the community edition which does not have an API interface. In some scenarios it is desirable make bulk updates/completions of reviews (and potentially update status of audits).
Doing this is slightly less trivial than expected… steps are:
Generate a list of review ids and foreign keys (maps review objects to model object [Asset, SecurityPolicy, ThirdPartyRisk, Risk]
Update the relevant review objects with completion date, comments, completed status
Create new reviews entries for next cycle
Update the model object [Asset, SecurityPolicy, ThirdPartyRisk, Risk] to reference the new, next review date
Update the object status mapping for the updated reviews (expired and current statuses in this case)
Validate your updated via the web interface
No clearing of cache of waiting for jobs is required
-- Generate a list of review ids and foreign keys (in this case the foreign keys are for the associated Assets being reviewed):

SELECT CONCAT_WS(',',Model,id,foreign_key) from reviews where planned_date = '2022-04-19' and model = 'Asset';

-- Update the relevant review objects as desired:

update reviews set actual_date = '2022-04-20',user_id = 2, description = 'No changes to store [components, customer, deployment etc, all same] added to ISMF Agenda ', completed = 1, modified = now(), edited = now()  where id in (select id from reviews where planned_date = '2022-04-19' and model = 'Asset');

-- Create new reviews (this is usually done by the app when completing the review via the web interface, review objects need a Model [Asset, SecurityPolicy, ThirdPartyRisk, Risk] (other models have audits):

INSERT INTO
	reviews(model, foreign_key, planned_date, completed, created, modified, deleted)
VALUES
('Asset',115,'2023-04-19',0,now(),now(),0),
('Asset',116,'2023-04-19',0,now(),now(),0),
...;

-- Update the Asset object to reference the new, next review date (get asset ID from query used to get review id + foreign_key)
update asset set review = '2023-04-19', expired_reviews = 0 where id in (select foreign_key from reviews where planned_date = '2022-04-19' and model =  'Asset');

-- Eramba has object statuses, the list of available statuses is defined in the object_status_statuses table; the mapping of objects to statuses is in the table: object_status_object_statuses
-- Note there will be better, safer queries to do this..:

-- Check the results select query so we know what we are updating
select * from object_status_object_statuses where foreign_key in (select id from reviews where planned_date = '2022-04-19' and model =  'Asset') and model = 'AssetReview' and name = 'expired';

-- Update the object status mappings for relevant items, in this case there are two statuses that need to be updated, the expired status (now should be 0_ and the current status (now should be 1)

update object_status_object_statuses set status = 0 where id in (select id from object_status_object_statuses
where foreign_key in (select id from reviews where planned_date = '2022-04-19' and model =  'Asset') and model = 'AssetReview' and name = 'expired');

update object_status_object_statuses set status = 1 where id in (select id from object_status_object_statuses
where foreign_key in (select id from reviews where planned_date = '2022-04-19' and model =  'Asset') and model = 'AssetReview' and name = 'current_review');
I regularly like to make rough diagrams/plans by drawing on paper. As I have an iPad Pro with a stylus sitting next to me I have often thought there would be some benefits to being able to use a sketching diagram to:
As I could not find an updated version of these for the new release I have made one. The repo for this, 2019 community version (specifically c2.4.1) can be found here: https://github.com/markz0r/eramba-community-docker
Follow the steps in README.md and you should be testing the new eramba in no time.
Mar, 2020: Updated for community edition 2.8.1
Thanks to the team at Eramba for making the tool available for all!
We have a web application that has been running on AWS for several years. As application load balancers and the AWS WAF service was not available, we utilised and external classic ELB point to a pool of EC2 instances running mod_security as our WAF solution. Mod_security was using the OWASP Mod_security core rule set.
Now that Application Load Balancers and AWS WAFs are available, we would like to remove the CPU bottleneck which stems from using EC2 instances with mod security as the current WAF.
Step 1 – Base-lining performance with EC2 WAF solution.
The baseline was completed using https://app.loadimpact.com where we ran 1000 concurrent users, with immediate rampup. On our test with 2 x m5.large EC2 instances as the WAF, the WAFs became CPU pinned within 2mins 30 seconds.
This test was repeated with the EC2 WAFs removed from the chain and we averaged 61ms across the loadimpact test with 1000 users. So – now we need to implement the AWS WAF solution so that can be compared.
Step 2 – Create an ‘equivalent’ rule-set and start using AWS WAF service.
We used terraform for this environment so the CloudFormation web ACL and rules are not being used and I will start be testing out the terraform code upload by traveloka. After having a look at the code in more detail I decided I need to get a better understanding of the terraform modules (and the AWS service) so I will write some terraform code from scratch.
So – getting started with the AWS WAF documentation we read, ‘define your conditions, combine your conditions into rules, and combine the rules into a web ACL.
Conditions: Request strings, source IPs, Country/Geo location of request IP, Length of specified parts of the requests, SQL code (SQL injection), header values (i.e.: User-Agent). Conditions can be multiple values and regex.
Rules: Combinations of conditions along with an ACTION (allow/block/count). There are Regular rules whereby conditions can be and/or chained. Rate-based rules where by the addition of a rate-based condition can be added.
Web ACLs: Whereby the action for rules are defined. Multiple rules can have the same action, thus be grouped in the same ACL. The WAF uses Web ACLs to assess requests against rules in the order which the rules are added to the ACL, whichever/if any rules is matched first defines which action is taken.
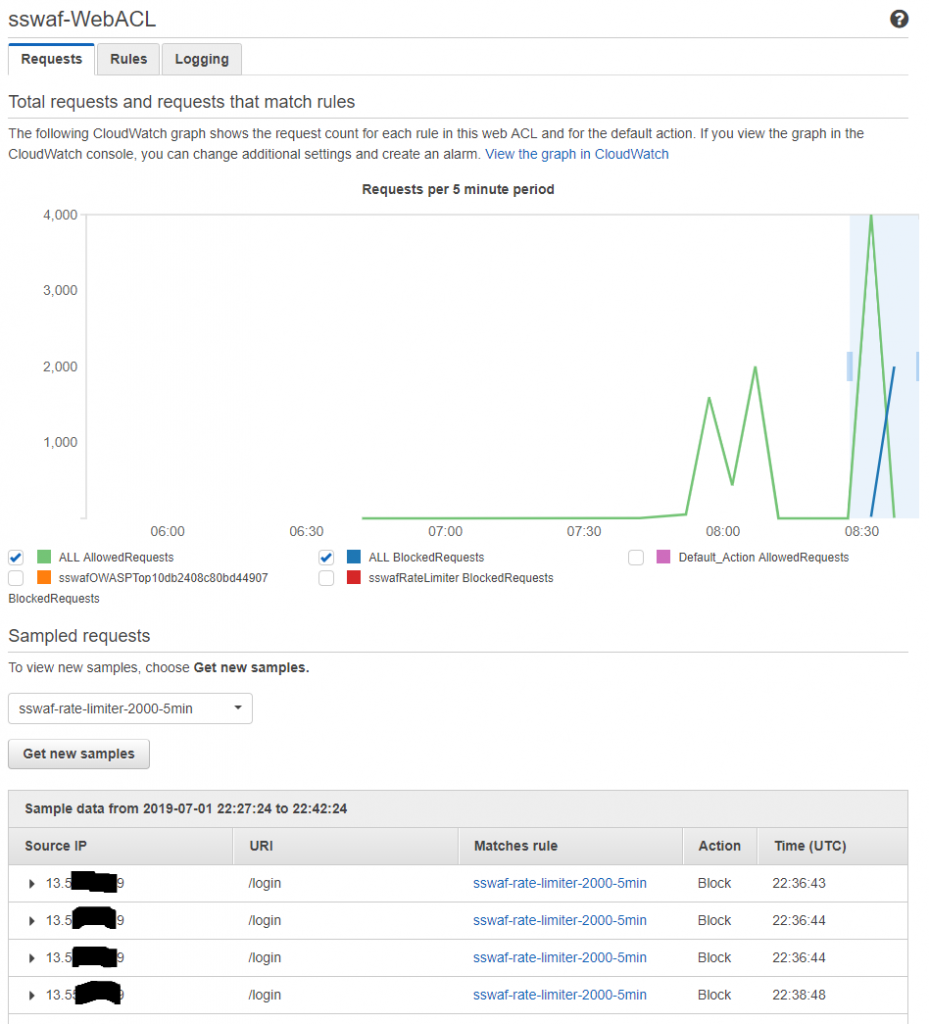
Starting simple: To get started I will implement a rate limiting rule which limits 5 requests per minute to our login page from a specified IP along with the basic OWASP rules from terraform code upload by traveloka . Below is our main.tf with the aws_waf_owasp_top_10_rules created for this test.
main.tf which references our newly created aws_waf_owasp_top_10_rules module
ab -v 3 -n 2000 -c 100 https://<my_target.com.au>/login > ab_2000_100_waf_test.log
This command logs request headers (-v 3 for verbosity of output), makes 2000 requests (-n 2000) and conducts those request 100 concurrently (-c 100). I can then see failed requests by tailing the output:
All looks good for the rate limiting based blocking, though it appears that blocking does not occur are exactly 2000 requests in the 5 minute period. It also appears that there is a significant (5-10min) delay on metrics coming through to the WAF stats in the AWS console.
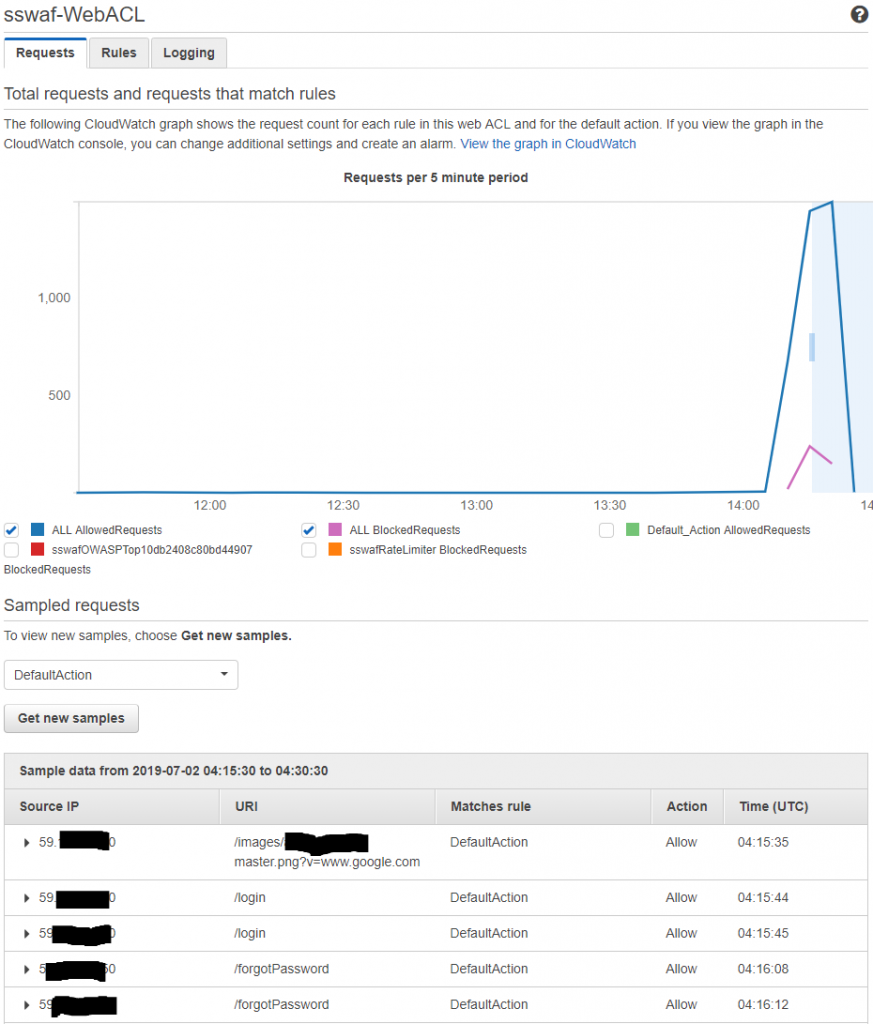
AWS console about 10 mins after running the HTTP AB tool we can see blocks
After success on the rate limiting rule, the OWASP Top 10 mitigation rules need to be tested. I will use Owasp Zap to generate some malicious traffic and see when happen!
So it works – which is good, but I am not really confident about the effectiveness of the OWASP rules (as implemented on the AWS WAF). For now, they will do… but some tuning will probably be desirable as all of the requests OWASP ZAP made contained (clearly) malicious content but only 7% (53 / 755) of the requests were blocked by the WAF service. It will be interesting to see if there are false positives (valid requests that are blocked) when I conduct step 4, performance testing.
Step 4 – Conduct performance test using AWS WAF service, and
Conducting a load test with https://app.loadimpact.com demonstrated that the AWS WAF service is highly unlikely to become a bottleneck (though this may differ for other applications and implementations).
Step 5 – Migrate PROD to the AWS WAF service.
Our environment is fully ‘terraformed’, implementing the AWS WAF service as part of our terraform code was working within an hour or so (which is good time for me!).
This week we are deforming objects to (create fancy of irregular objects). Starting with the ‘scale’ tool, we look at how to scale 3d objects, and how holding ‘shift’ ensures that objects are scaled with reference to the center point. If only one side is selected the center point is the center of the 2d side, but we can also triple client with the select tool to select the entire 3d object and scale with reference to the central point of the 3d shape by holding the ctrl key.
Duplication can be achieved with the move tool, ctrl + move, place the new copy where desired then type ‘5x’ for 5 copies. We make some curtains by stringing together curves, making a 2d shape then using the push/pull tool. Duplications, scales and mirrors using scale are all then needed for the curtains. Next we learn the the flip along is more useful than the scale tool for mirroring…
Internal copy arrays were covered next – enabling the duplication of an object to x distance away then using type /4, 3 new object are created at equal spacing between the original and the first copy.
Finally faces and planes were examined. Face have 2 sides, one light (front), one dark (back). Entity information indicates the colors of the front and back faces. Note that light reflection varies with the camera perspective. Change orientation of the plane enables reversing of the orientation of the faces (so that dark and bright effect is controllable). Using right click and ‘orient faces’ can force all faces of an object to be uniform.
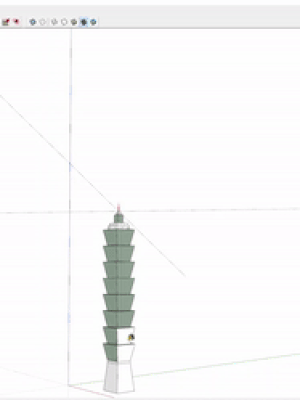
The assignment this week was a re-creation of taipei 101.
With almost all of our clients now preferring AWS and Azure for hosting VMs / Docker containers we have to manage a lot of AMIs / VM images. Ensuring that these AMIs are correctly configured, hardened and patched is a critical requirement. To do this time and cost effectively, we use packer and ansible. There are solutions such as Amazon’s ECS that extend the boundary of the opaque cloud all the way to the containers, which has a number of benefits but does not currently meet a number of non-functional requirements for most of our clients. If those non-functional requirements we gone, or met by something like AWS ECS, it would be hard to argue against simply using terraform and ecs – removing our responsibility for managing the docker host VMs.
Anyway, we are making some updates to our IaaS code base which includes a number of new requirements and code changes to our packer and ansible code. To make these changes correctly and quickly I need a build/test cycle that is as short as possible (shorted than spinning up a new EC2 instance). Fortunately, one of the benefits of packer is the ‘cloud agnosticism’… so theoretically I should be able to test 99% of my new packer and ansible code on my windows 10 laptop using packer’s Hyper-V Builder.
Setting up
I am running Windows 10 Pro on a Dell XPS 15 9560. VirtualBox is the most common go-to option for local vm testing but thats not an option if you are already running Hyper-V (which I am). So to get things started we need to:
Have a git solution for windows – I am using Microsoft’s VS Code (which is really a great opensource tool from M$)
Install packer for windows, ensuring the executable is in the Windows PATH
Create VM in Hyper-V to act as a base template (I am using Centos 7 minimal as we use https://www.centos.org/download/CentOs AMIs on AWS)
Install Hyper-V Linux Integration Services on the Centos 7 base VM (this is required for Packer to be able to determine new VMs’ IP addresses) – if you are stuck with packer failing to connect with SSH to the VM and you are using a Hyper-V switch this will most likely be the issue
Add a Hyper-V builder to our packer.json (as below)
Now, assuming the packer and ansible code is in a funcitonal state, I can build a new VM and run packer + ansible via powershell (run with administrative privileges) with:
Unfortunately, as is common with these online course, I go distracted and was late on week 4. Luckily it was a pretty light week, working through:
Follow me tool
Rotation tool
Working with spheres
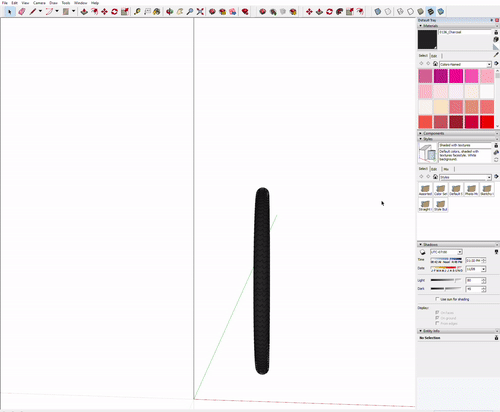
The assignment was creating a bike wheel with tread on the tyre. Getting the tread right was a bit finicky and since I created a circle with ‘too many sides’ rendering was very slow on my dell xps 15 9560.
Will work on getting back ahead of the schedule for week 5…