Categories
GoLang Web Application Random

Free Golang IDE (s) on macos (Visual Studio Code / vim)

Visual Studio Code

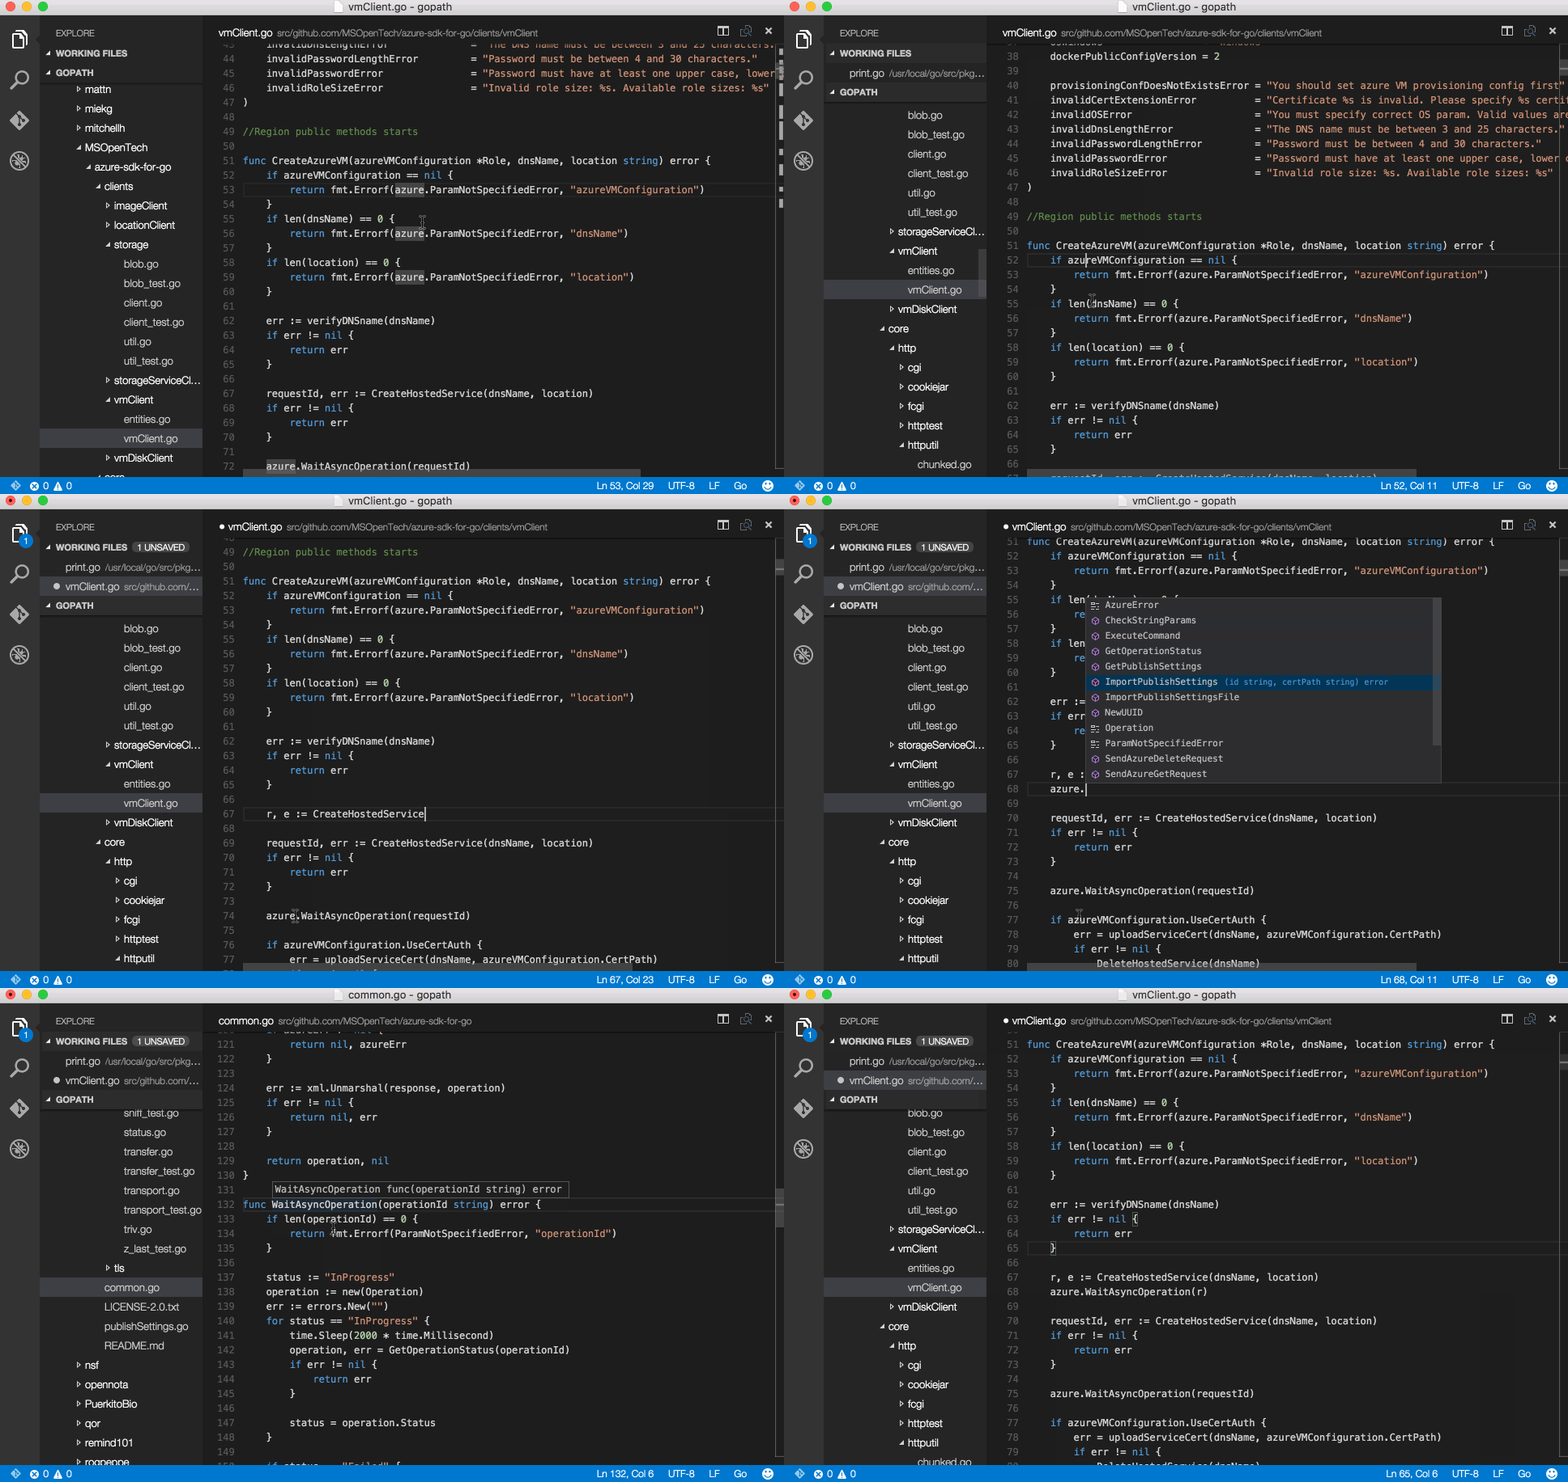
Visual Studio Code is a now is Microsoft’s now OpenSource IDE that runs on windows, macos and linux!

Simple set up guide here: https://rominirani.com/setup-go-development-environment-with-visual-studio-code-7ea5d643a51a. Assuming go is installed and ready to do – the download, install and setup took about 5 minutes. Everything just works out of the box and its much less dependency on complex config files and plugins (vs vim).


Vim (abandoned this for Microsoft Visual Code)

Install these if they are not already:

brew install vim
# Note that is is executing arbitrary code from an the vim-go repo 
curl -fLo ~/.vim/autoload/plug.vim --create-dirs https://raw.githubusercontent.com/junegunn/vim-plug/master/plug.vim 
git clone https://github.com/fatih/vim-go.git ~/.vim/plugged/vim-go
  • Customise ~/.vimrc to enable and configure your plugins and shortcut keys
  • Once th ~/.vimrc is added run :GoInstallBinaries to get vim-go’s dependencies

Shortcut keys in this vimrc:

  • \ + b -> build
    • if errors occur toggle forward and back through them with ctrl + n and ctrl + m
    • close quick fix dialogue boxes with \ + a
  • \ + i -> install
  • dif (whilst on func def, delete all contents for func)

Autocompletion sucks though 🙁 so adding neocomplete is a must).

With existing versions of brew installed vim and the introduced dependency of xcode makes the setup time high. I went through this in the past and after a fairly long hiatus from writing code if find nothing is working quite right.


Categories
Random

Download all Evernote attachments via Evernote API with Python

Python script for downloading snapshots of all attachments in all of your Evernote notebooks.

#!/usr/bin/python
import json, os, pickle, httplib2, io
import evernote.edam.userstore.constants as UserStoreConstants
import evernote.edam.type.ttypes as Types
from evernote.api.client import EvernoteClient
from evernote.edam.notestore.ttypes import NoteFilter, NotesMetadataResultSpec
from datetime import date

# Pre-reqs: pip install evernote 
# API key from https://dev.evernote.com/#apikey

os.environ["PYTHONPATH"] = "/Library/Python/2.7/site-packages"

CREDENTIALS_FILE=".evernote_creds.json"
LOCAL_TOKEN=".evernote_token.pkl"
OUTPUT_DIR=str(date.today())+"_evernote_backup"

def prepDest():
    if not os.path.exists(OUTPUT_DIR):
        os.makedirs(OUTPUT_DIR)
        return True
    return True

# Helper function to turn query string parameters into a 
# source: https://gist.github.com/inkedmn
def parse_query_string(authorize_url):
    uargs = authorize_url.split('?')
    vals = {}
    if len(uargs) == 1:
        raise Exception('Invalid Authorization URL')
    for pair in uargs[1].split('&'):
        key, value = pair.split('=', 1)
        vals[key] = value
    return vals

class AuthToken(object):
    def __init__(self, token_list):
        self.oauth_token_list = token_list

def authenticate():
    def storeToken(auth_token):
        with open(LOCAL_TOKEN, 'wb') as output:
            pickle.dump(auth_token, output, pickle.HIGHEST_PROTOCOL)    

    def oauthFlow():
        with open(CREDENTIALS_FILE) as data_file:    
            data = json.load(data_file)
            client = EvernoteClient(
                consumer_key = data.get('consumer_key'),
                consumer_secret = data.get('consumer_secret'),
                sandbox=False
            )
        request_token = client.get_request_token('https://assetowl.com')
        print(request_token)
        print("Token expired, load in browser: " + client.get_authorize_url(request_token))
        print "Paste the URL after login here:"
        authurl = raw_input()
        vals = parse_query_string(authurl)
        auth_token=client.get_access_token(request_token['oauth_token'],request_token['oauth_token_secret'],vals['oauth_verifier'])
        storeToken(AuthToken(auth_token))
        return auth_token

    def storeToken(auth_token):
        with open(LOCAL_TOKEN, 'wb') as output:
            pickle.dump(auth_token, output, pickle.HIGHEST_PROTOCOL)    

    def getToken():
        store_token=""
        if os.path.isfile(LOCAL_TOKEN):
            with open(LOCAL_TOKEN, 'rb') as input:
              clientt = pickle.load(input)
            store_token=clientt.oauth_token_list
        return store_token

    try:
        client = EvernoteClient(token=getToken(),sandbox=False)
        userStore = client.get_user_store()
        user = userStore.getUser()
    except Exception as e:
        print(e)
        client = EvernoteClient(token=oauthFlow(),sandbox=False)
    return client

def listNotes(client):
    note_list=[]
    note_store = client.get_note_store()
    filter = NoteFilter()    
    filter.ascending = False
    spec = NotesMetadataResultSpec(includeTitle=True)
    spec.includeTitle = True
    notes = note_store.findNotesMetadata(client.token, filter, 0, 100, spec)
    for note in notes.notes:
        for resource in note_store.getNote(client.token, note.guid, False, False, True, False).resources:
            note_list.append([resource.attributes.fileName, resource.guid])
    return note_list


def downloadResources(web_prefix, res_array):
    for res in res_array:
        res_url = "%sres/%s" % (web_prefix, res[1])
        print("Downloading: " + res_url + " to " + OUTPUT_DIR + res[0])
        h = httplib2.Http(".cache")
        (resp_headers, content) = h.request(res_url, "POST",
                                        headers={'auth': DEV_TOKEN})
        with open(os.path.join(OUTPUT_DIR, res[0]), "wb") as wer:
            wer.write(content)

def main():
    if prepDest():
        client = authenticate()
        user_store=client.get_user_store()
        web_prefix = user_store.getPublicUserInfo(user_store.getUser().username).webApiUrlPrefix
        downloadResources(web_prefix, listNotes(client))

if __name__ == '__main__':
    main()

Categories
Random

Downloading Google Drive with Python via Drive API

Python script for downloading snapshots of all file in your google drive, including those shared with you.

source: https://github.com/SecurityShift/tools/blob/master/backup_scripts/google_drive_backup.py


Categories
Random

Configuring Snort Rules

Some reading before starting:

Before setting out, getting some basic concepts about snort is important.

This deployment with be in Network Intrusion Detection System (NIDS) mode – which performs detection and analysis on traffic. See other options and nice and concise introduction:  http://manual.snort.org/node3.html.

Rule application order: activation->dynamic->pass->drop->sdrop->reject->alert->log

Again drawing from the snort manual some basic understanding of snort alerts can be found:

    [**] [116:56:1] (snort_decoder): T/TCP Detected [**]

116 –  Generator ID, tells us what component of snort generated the alert

Eliminating false positives

After running pulled pork and using the default snort.conf there will likely be a lot of false positives. Most of these will come from the preprocessor rules. To eliminate false positives there are a few options, to retain maintainability of the rulesets and the ability to use pulled pork, do not edit rule files directly. I use the following steps:

  1. Create an alternate startup configuration for snort and barnyard2 without -D (daemon) and barnyard2 config that only writes to stdout, not the database. – Now we can stop and start snort and barnyard2 quickly to test our rule changes.
  2. Open up the relevant documentation, especially for preprocessor tuning – see the ‘doc’ directory in the snort source.
  3. Have some scripts/traffic replays ready with traffic/attacks you need to be alerting on
  4. Iterate through reading the doc, making changes to snort.conf(for preprocessor config), adding exceptions/suppressions to snort’s threshold.conf or PulledPork’s disablesid, dropsid, enablesid, modifysid confs for pulled pork and running the IDS to check for false positives.

If there are multiple operating systems in your environment, for best results define ipvars to isolate the different OSs. This will ensure you can eliminate false positives whilst maintaining a tight alerting policy.

HttpInspect

From doc: HttpInspect is a generic HTTP decoder for user applications. Given a data buffer, HttpInspect will decode the buffer,  find HTTP fields, and normalize the fields. HttpInspect works on both client requests and server responses.

Global config –

Custom rules

Writing custom rules using snorts lightweight rules description language enables snort to be used for tasks beyond intrusion detection. This example will look at writing a rule to detect Internet Explorer 6 user agents connecting to port 443.

Rule Headers -> [Rule Actions, Protocols, IP Addresses and ports, Direction Operator,

Rule Options -> [content: blah;msg: blah;nocase;HTTP_header;]

Rule Option categories:

  • general – informational only — msg:, reference:, gid:, sid:, rev:, classtype:, priority:, metadata:
  • payload – look for data inside the packet —
    • content: set rules that search for specific content in the packet payload and trigger a response based on that data (Boyer-Moore pattern match). If there is a match anywhere within the packets payload the remainder of the rule option tests are performed (case sensitive). Can contain mixed text and binary data. Binary data is represented as hexdecimal with pipe separators — (content:”|5c 00|P|00|I|00|P|00|E|00 5c|”;). Multiple content rules can be specified in one rule to reduce false positives. Content has a number of modifiers: [nocase, rawbytes, depth, offset, distance, within, http_client_body, http_cookie, http_raw_cookie, http_header, http_raw_header, http_method, http_uri, http_raw_uri, http_stat_code, http_stat_msg, fast_pattern.
  • non-payload – look for non-payload data
  • post-detection – rule specific triggers that are enacted after a rule has been matched
Categories
Random

Validating certificate chains with openssl

Using openssl to verfiy certificate chains is pretty straight forward – see a full script below.

One thing that confused me for a bit was how to specify trust anchors without importing them to the pki config of the os (I also did not want to accept all of the trust anchors).

So.. here what to do for specif trust anchors

# make a directory and copy in all desired trust anchors
# make sure the certs are in pem format, named <bah>.pem
mkdir ~/trustanchors
# create softlinks with hash 
cd ~/trustanchors
for X in ./*.pem;do ln -s $X ./`openssl x509 -hash -noout -in $X`.0;done

# confirm the trust anchor(s) are working as expected
openssl verify -CApath ~/trustanchors -CAfile <some_intermediate>.pem <my_leaf>.pem

So here’s a simple script that will pull the cert chain from a [domain] [port] and let you know if it is invalid – note there will likely be come bugs from characters being encoded / return carriages missing:

#!/bin/bash

# chain_collector.sh [domain] [port]
# output to stdout
# assumes you have a directory with desired trust anchors at ~/trustanchors

if [ $# -ne 2 ]; then
	echo "USAGE: chain_collector.sh [domain] [port]"
	exit 1
fi

TRUSTANCHOR_DIR="~/trustanchors"
SERVER=$1:$2
TFILE="/tmp/$(basename $0).$$.tmp"
OUTPUT_DIR=$1_$2
mkdir $OUTPUT_DIR

openssl s_client -showcerts -servername $1 -connect $SERVER 2>/dev/null > $TFILE
awk 'BEGIN {c=0;} /BEGIN CERT/{c++} { print > "tmpcert." c ".pem"}' < $TFILE 
i=1 
for X in tmpcert.*.pem; do
    if openssl x509 -noout -in $X 2>/dev/null ; then 
        echo "#############################"
        cn=$(openssl x509 -noout -subject -in $X | sed -e 's#.*CN=\(\)#\1#')
	echo CN: $cn
	cp $X $OUTPUT_DIR/${cn// /_}.$((i-1)).pem 
	cert_expiry_date=$(openssl x509 -noout -enddate -in $X \
			| awk -F= ' /notAfter/ { printf("%s\n",$NF); } ')
	seconds_until_expiry=$(echo "$(date --date="$cert_expiry_date" +%s) \ 
                                     - $(date +%s)" |bc)
        days_until_expiry=$(echo "$seconds_until_expiry/(60*60*24)" |bc)
	echo Days until expiry: $days_until_expiry
	echo $(openssl x509 -noout -text -in $X | \ 
                grep -m1 "Signature Algorithm:" | head)
	echo $(openssl x509 -noout -issuer -in $X)
	if [ -a tmpcert.$i.pem ]; then
		echo Parent: $(openssl x509 -noout -subject \ 
                                   -in tmpcert.$i.pem | sed -e 's#.*CN=\(\)#\1#')
	        echo Parent Valid? $(openssl verify -verbose -CAfile tmpcert.$i.pem $X)	
	else
		echo "Parent Valid? This is the trust anchor"
	fi
	echo "#############################"
    fi
    ((i++))
done
rm -f tmpcert.*.pem $TFILE
Categories
Random

SSL Review part 2

RSA in practice

Initializing SSL/TLS with https://youtube.com

In this example the youtube server is authenticated via it’s certificate and an encrypted communication session established. Taking a packet capture of the process enables simple identification of the TLSv1.1 handshake (as described: http://en.wikipedia.org/wiki/Transport_Layer_Security#TLS_handshake):

Packet capture download: http://mchost/sourcecode/security_notes/youtube_TLSv1.1_handshake_filtered.pcap

The packet capture starts with the TCP three-way handshake – Frames 1-3

With a TCP connection established the TLS handshake begins, Negotiation phase:

  1. ClientHello – Frame 4 – A random number[90:fd:91:2e:d8:c5:e7:f7:85:3c:dd:f7:6d:f7:80:68:ae:2b:05:8e:03:44:f0:e8:15:22:69:b7], Cipher suites, compression methods and session ticket (if reconnecting session).
  2. ServerHello – Frame 6 – chosen protocol version [TLS 1.1], random number [1b:97:2e:f3:58:70:d1:70:d1:de:d9:b6:c3:30:94:e0:10:1a:48:1c:cc:d7:4d:a4:b5:f3:f8:78], CipherSuite [TLS_ECDHE_ECDSA_WITH_RC4_128_SHA], Compression method [null], SessionTicket [null]
  3. Server send certificate message (depending on cipher suite)
  4. Server sends ServerHelloDone
  5. Client responds with ClientKeyExchange containing PreMasterSecret, public key or nothing. (depending on cipher suite) – PreMasterSecret is encrypted using the server public key
  6. Client and server use the random numbers and PreMsterSecret to compute a common secret – master secret
  7. Client sends ChangeCipherSpec record
  8. Client sends authenticated and encrypted Finished – contains a hash and MAC of previous handshake message
  9. Server decrypts the hash and MAC to verify
  10. Server sends ChangeCipherSpec
  11. Server sends Finished – with hash and MAC for verification
  12. Application phase – the handshake is now complete, application protocol enable with content type 23

client random: 90:fd:91:2e:d8:c5:e7:f7:85:3c:dd:f7:6d:f7:80:68:ae:2b:05:8e:03:44:f0:e8:15:22:69:b7 = 10447666340000000000

server random: 1b:97:2e:f3:58:70:d1:70:d1:de:d9:b6:c3:30:94:e0:10:1a:48:1c:cc:d7:4d:a4:b5:f3:f8:78 = 1988109383203082608

Interestingly the negotiation with youtube.com and chromium browser resulted in Elliptic Curve Cryptography (ECC) Cipher Suitesfor Transport Layer Security (TLS) as the chosen cipher suite.

Note that there is no step mention here for the client to verify then certificate. In the past most browsers would query a certificate revocation list (CRL), though browsers such as chrome now maintain either ignore CRL functionality or use certificate pinning.

Chrome will instead rely on its automatic update mechanism to maintain a list of certificates that have been revoked for security reasons. Langley called on certificate authorities to provide a list of revoked certificates that Google bots can automatically fetch. The time frame for the Chrome changes to go into effect are “on the order of months,” a Google spokesman said. – source: http://arstechnica.com/business/2012/02/google-strips-chrome-of-ssl-revocation-checking/

Categories
Random

nf_conntrack: table full, dropping packet on Nessus server

Issue caused by having iptables rule/s that track connection state. If the number of connections being tracked exceeds the default nf_conntrack table size [65536] then any additional connections will be dropped. Most likely to occur on machines used for NAT and scanning/discovery tools (such as Nessus and Nmap).

Symptoms: Once the connection table is full any additional connection attempts will be blackholed.


This issue can be detected using:

$dmesg
nf_conntrack: table full, dropping packet.
...

Current conntrack settings can be displayed using:

$sysctl -a | grep conntrack
net.netfilter.nf_conntrack_generic_timeout = 600
net.netfilter.nf_conntrack_tcp_timeout_syn_sent = 120
net.netfilter.nf_conntrack_tcp_timeout_syn_recv = 60
net.netfilter.nf_conntrack_tcp_timeout_established = 432000
net.netfilter.nf_conntrack_tcp_timeout_fin_wait = 120
net.netfilter.nf_conntrack_tcp_timeout_close_wait = 60
net.netfilter.nf_conntrack_tcp_timeout_last_ack = 30
net.netfilter.nf_conntrack_tcp_timeout_time_wait = 120
net.netfilter.nf_conntrack_tcp_timeout_close = 10
net.netfilter.nf_conntrack_tcp_timeout_max_retrans = 300
net.netfilter.nf_conntrack_tcp_timeout_unacknowledged = 300
net.netfilter.nf_conntrack_tcp_loose = 1
net.netfilter.nf_conntrack_tcp_be_liberal = 0
net.netfilter.nf_conntrack_tcp_max_retrans = 3
net.netfilter.nf_conntrack_udp_timeout = 30
net.netfilter.nf_conntrack_udp_timeout_stream = 180
net.netfilter.nf_conntrack_icmpv6_timeout = 30
net.netfilter.nf_conntrack_icmp_timeout = 30
net.netfilter.nf_conntrack_acct = 0
net.netfilter.nf_conntrack_events = 1
net.netfilter.nf_conntrack_events_retry_timeout = 15
net.netfilter.nf_conntrack_max = 65536
net.netfilter.nf_conntrack_count = 1
net.netfilter.nf_conntrack_buckets = 16384
net.netfilter.nf_conntrack_checksum = 1
net.netfilter.nf_conntrack_log_invalid = 0
net.netfilter.nf_conntrack_expect_max = 256
net.ipv6.nf_conntrack_frag6_timeout = 60
net.ipv6.nf_conntrack_frag6_low_thresh = 196608
net.ipv6.nf_conntrack_frag6_high_thresh = 262144
net.nf_conntrack_max = 65536

To check the current number of connections being tracked by conntrack:

/sbin/sysctl net.netfilter.nf_conntrack_count

Options for fixing the issue are:

  1. Stop using stateful connection rules in iptables (probably not an option in most cases)
  2. Increase the size of the connection tracking table (also requires increasing the conntrack hash table)
  3. Decreasing timeout values, reducing how long connection attempts are stored (this is particularly relevant for Nessus scanning machines that can be configured to attempt many simultaneous port scans across an IP range)


Making the changes in a persistent fashion RHEL 6 examples:

# 2: Increase number of connections
echo "net.netfilter.nf_conntrack_max = 786432" >> /etc/sysctl.conf
echo "net.netfilter.nf_conntrack_buckets = 196608" >> /etc/sysctl.conf
# Increase number of bucket to change ration from 1:8 to 1:4 (more # memory use but better performance)
echo 'echo "196608" > /sys/module/nf_conntrack/parameters/hashsize' >> /etc/rc.local

# 3: Alter timeout values
# Generic timeout from 10 mins to 1 min
echo "net.netfilter.nf_conntrack_generic_timeout = 60" > /etc/sysctl.conf

# Change unacknowledged timeout to 30 seconds (from 10 mins)
echo "net.netfilter.nf_conntrack_tcp_timeout_unacknowledged = 30" > /etc/sysctl.conf

# Change established connection timeout to 1 hour (from 10 days)
echo "net.netfilter.nf_conntrack_tcp_timeout_established = 3600" > /etc/sysctl.conf

These changes will persist on reboot.

To apply changes without reboot run the following:

sysctl -p
echo "196608" > /sys/module/nf_conntrack/parameters/hashsize

To review changes:

sysctl -a | grep conntrack

Reference and further reading: http://antmeetspenguin.blogspot.com.au/2011/01/high-performance-linux-router.html

Categories
Random

Setting secure, httpOnly and cache control headers using ModSecurity

Many older web applications do not apply headers/tags that are now considered standard information security practices. For example:

  • Pragma: no-cache
  • Cache-Control: no-cache
  • httpOnly and secure flags

Adding these controls can be achieved using ModSecurity without any needs to modify the application code.

In the case where I needed to modify the cookie headers to include these now controls I added the following to core rule set file: modsecurity_crs_16_session_hijacking.conf.

#
# This rule will identify the outbound Set-Cookie SessionID data and capture it in a setsid
#
#addding httpOnly
Header edit Set-Cookie "(?i)^(JSESSIONID=(?:(?!httponly).)+)$" "$1; httpOnly"
Header set Cache-Control "no-cache, no-store, must-revalidate"
Header set Pragma "no-cache"
Header set Expires "0"


This adds the cookie controls we were after – Depending on your web application you may need to change ‘JSESSIONID’ to the name of the relevant cookie.

You can find the cookie name simply using browser tools such as Chrome’s Developer Tools (hit F12 in chrome). Load the page you want to check cookies for, click on the Resources tab:

ChromeCookies

After setting the HTTPOnly and Secure flags you can check the effectiveness using the Console table and listing the document cookies… which should now return nothing.

document.cookie

Categories
Random

Migrating to EJBCA from OpenSSL and TinyCA

Install and configure EJBCA

EJBCA 6.0.3 – http://www.ejbca.org/download.html

JBoss AS 7.1.1 Final – http://download.jboss.org/jbossas/7.1/jboss-as-7.1.1.Final/jboss-as-7.1.1.Final.zip

Prereqs:

Ref:

Detailed deployment guide: http://majic.rs/book/free-software-x509-cookbook/setting-up-ejbca-as-certification-authority

EJBCA doc: http://wiki.ejbca.org/

Architecture

Recommended architecture (source: http://ejbca.org/architecture.html)

Import existing OpenSSL CA

Step 1 – Export the OpenSSL priv key and cert to a PKCS#12 keystore:

openssl pkcs12 -export -out exitingCA1.p12 -inkey  \
        -in  -name existingCA1

Step 2 – Import the PKCS#12 keystore to EJBCA CA

/bin/ejbca.sh ca importca  existingCA1.p12

Step 3 – Verify import

/bin/ejbca.sh ra adduser

### IMPORTANT ###

Distinguished name order of openssl may be opposite of ejbca default configuration – http://www.csita.unige.it/software/free/ejbca/ … If so, this ordering must changed in ejbca configuration prior to deploying (can’t be set on a per CA basis)

Have not been able to replicate this issue in testing.

Import existing TinyCA CA

Basic Admin and User operations

Create and end entity profile for server/client entities

Step 1 – Create a Certificate Profile (http://wiki.ejbca.org/certificateprofiles)

Step 2 – Create and End Entity Profile (http://wiki.ejbca.org/endentityprofiles)

* EndEntities can be deleted using:

/bin/ejbca.sh ra delendentity 

Issuing certificates from CSRs

End entities need to be created for clients/servers that require certificates signed by our CA.

Step 1 – Create and End Entity (http://ejbca.org/userguide.html#Issue a new server certificate from a CSR)

Step 2 – Sign CSR using the End Entity which is associated with a CA

Importing existing certificates

EJBCA can create endentities and import their existing certificate one-by-one or in bulk (http://www.ejbca.org/docs/adminguide.html#Importing Certificates). Bulk inserts import all certificates under a single user which may not be desirable. Below is a script to import all certs in a directory one by one under a new endentity which will take the name of the certificate CN.

#!/bin/sh

# for each certificate in the directory
#       create and enduserentity
#       enduserentity username = certificate CN
#       enduserentity token/pwrd = certificate CN

EJBCA_HOME="/usr/share/ejbca"
IMPORT_DIR=$1
CA=$2
ENDENTITYPROFILE=$3
SSLCERTPROFILE=$4
AP="_OTE"

if [ $# -lt 4 ]; then
        echo "usage: import_existing_certs.sh    "
        exit 1
fi
for X in $IMPORT_DIR*.pem
do
        echo "######################################################"
        echo "Importing: " $X
        CN=$(openssl x509 -in $X -noout -text | grep Subject: | sed -n 's/^.*CN=\(.*\),*/\1/p')
        echo "CN: " $CN
        printf "Running import: %s ca importcert '%s' '%s' '%s' ACTIVE NULL '%s' '%s' '%s'\n" "$EJBCA_HOME/bin/ejbca.sh" "$CN" "$CN" "$CA" "$X" "$ENDENTITYPROFILE" "$SSLCERTPROFILE"
        $EJBCA_HOME/bin/ejbca.sh ca importcert "$CN$AP" "$CN$AP" "$CA" ACTIVE null $X $ENDENTITYPROFILE $SSLCERTPROFILE
        echo "######################################################"
done

Creating administrators

Create administrators that can sign CSR and revoke certificates: http://ejbca.org/userguide.html#Administrator%20roles

Revoking certificates

#Generate CRL via command line
# List CAs
/usr/share/ejbca/bin/ejbca.sh CA listcas
# Create new CRLs:
/usr/share/ejbca/bin/ejbca.sh CA createcrl "" -pem 
# Export CRL to file
/usr/share/ejbca/bin/ejbca.sh CA getcrl "" -pem .pem

Checking certificate validity/revoke status via OSCP

openssl ocsp -issuer gtld_CA_cert.pem -CAfile gtld_CA_cert.pem \
-cert gtld_registrar5.pem -req_text -url http://localhost:8080/ejbca/publicweb/status/ocsp

Monitoring expiring certs

/bin/ejbca.sh listexpired 100


Categories
Random

Getting started with ModSecurity

XSS, CSRF and similar types of web application attacks have overtaken SQL injections as the most commonly seen attacks on the internet (https://info.cenzic.com/2013-Application-Security-Trends-Report.html). A very large number of web application were written and deployed prior to the trend up in likelihood and awareness of XSS attacks. Thus, it is extremely important to have an effective method of testing for XSS vulnerabilities and mitigating them.

Changes to production code bases can be slow, costly and can miss unreported vulnerabilities quite easily. The use of application firewalls such as ModSecurity (https://github.com/SpiderLabs/ModSecurity/) become an increasingly attractive solution when faced with a decision on how to mitigate current and future XSS vulnerabilities.

Mod Security can be embedded with Apache, NGINX and IIS which is relativity straight forward. In cases where alternative web severs are being used ModSecurity can still be a viable option by creating a reverse proxy (using Apache of NGINX).

How can ModSecurity be used?

  • Alerting
  • Transforming
  • Blocking
  • and more

These functions can be enacted by rules.

A default action can be created for a group of rules using the configuration directive “SecDefaultAction

Using the following SecDefaultAction at the top of rule set that we want enable blocking and transforming on is a blunt method of protection. Redirection can also be used as a method of blocking.

A powerful web application firewall - free software!
A powerful web application firewall – free software!

Example of a default action to be applied by ruleset (note defaults cascade through the ruleset files):

SecDefaultAction “phase:2,log,auditlog,deny,status:403,tag:’Unspecified usage'”

Rulesets have been created by OWASP.

Using optional rulesets,  modsecurity_crs_16_session_hijacking.conf and modsecurity_crs_43_csrf_protection.conf ModSecurity can provide protection against Cross Site Request Forgeries [CSRF]. The @rsub operators can inject a token on every form (and/or other html elements). ModSecurity can store the expected token value as a variable which is compared to the value posted via forms or other html elements. ModSecurity rules can be based on request methods and URIs etc – alongside the ability to chain rules there are a huge number of options for mitigating XSS and CSRF without impacting normal applicatioin usage.

@rsub

Requirements:

  • SecRuleEngine On
  • SecRequestBodyAccess On
  • SecResponseBodyAccess On

## To enable @rsub

  • SecStreamOutBodyInspection On
  • SecStreamInBodyInspection On
  • SecContentInjection On

Injecting unique request id from mod_unique_id into forms:

SecRule STREAM_OUTPUT_BODY "@rsub s/<\/form>/<input type=\"hidden\" name=\"rv_token\" value=\"%{unique_id}\"><\/form>/" \
"phase:4,t:none,nolog,pass"

Some simple rules:

<LocationMatch ".*\/<directory requiring authentication>\/.*">
# All requests submitted using POST require a token - not the validation of the token can only be completed if that variable is stored from a previous response
SecRule REQUEST_METHOD "^(?:POST)$" "chain,phase:2,id:'1234',t:none,block,msg:'CSRF Attack Detected - Missing CSRF Token when using POST method - ',redirect:/" SecRule &ARGS:token "!@eq 1" "setvar:'tx.msg=%{rule.msg}',setvar:tx.anomaly_score=+%{tx.critical_anomaly_score},setvar:tx.%{rule.id}-WEB_ATTACK/CSRF-%{matched_var_name}=%{matched_var}"
# Check referrer is valid for an authenticated area of the application

SecRule REQUEST_HEADERS:Referer "!@contains <my website>" "block,phase:2,id:'2345',t:none,block,msg:'CSRF Attack Detected - No external referers allowed to internal portal pages',redirect:/" SecRule REQUEST_URI "@contains confirmUpdate" "chain,phase:2,id:'3456',t:none,block,msg:'CSRF Attack Detected - Missing CSRF Token. Confirmation button - ',redirect:/" SecRule &ARGS:rv_token "!@eq 1" "setvar:'tx.msg=%{rule.msg}',setvar:tx.anomaly_score=+%{tx.critical_anomaly_score},setvar:tx.%{rule.id}-WEB_ATTACK/CSRF-%{matched_var_name}=%{matched_var}" </LocationMatch>

Pros:

  • Wide capabilities for logging, alerts, blocking, redirecting, transforming
  • Parses everything coming into your web server over HTTP
  • Virtual patching – if a vulnerability is made public that affects your web application you can write and deploy a rule to mitigate the vulnerability much faster than re-release of application code patched
  • Extended uses – the capabilities of ModSecurity can be applied to applications outside the scope of application security

Cons:

  • Added complexity to your application delivery chain – another point for maintenance and failure
  • Performance costs? – Though I have not had the opportunity to test the performance costs holding session information in memory and inspecting every byte of HTTP traffic can’t be free from performance cost
  • Hardware costs – Particularly if using ModSecurity’s BodyAccess and BodyInspection features, memory usage will be significant

Improving deployments:

  • Starting off being aggressive on warnings and very light on action is a necessity to ensure no impact on normal application usage
  • From this point rules and actions need to be refined
  • Understanding how the applications works allows the use of ModSecuirtys header and body inspection in effective ways

Some other notes extracted from the ModSecurity Handbook – If you decide to use ModSecurity I strongly recommend buying the handbook. It is not expensive and saves a lot of time.

### RULE STRUCTURE ###
SecRule VARIABLES OPERATOR [TRANSFORMATION_FUNCTIONS, ACTIONS]

### VARIABLES ###
REQUEST_URI Request URI, convert to exclude hostname
REQUEST_METHOD Request method
ARGS Request parameters (read-only collection)
ARGS_NAMES Request parameters’ names (collection)
ARGS_GET Query string parameters (read-only collection)
ARGS_GET_NAMES Query string parameters’ names (read-only collection)
ARGS_POST Request body parameters (read-only collection)
ARGS_POST_NAMES Request body parameters’ names (read-only collection)
### STRING MATCHING OPERATORS ###
@beginsWith Input begins with parameter
@contains Input contains parameter
@endsWith Input ends with parameter
@rsub Manipulation of request and response bodies
@rx Regular pattern match in input
@pm Parallel pattern matching
@pmFromFile (also @pmf as of 2.6) Parallel patterns matching, with patterns read from a file
@streq Input equal to parameter
@within Parameter contains input
### NUMBER MATCHING OPERATORS ###
@eq Equal
@ge Greater or equal
@gt Greater than
@le Less or equal
@lt Less than
### ACTIONS ###
# DISRUPTIVE
allow Stop processing of one or more remaining phases
block Indicate that a rule wants to block
deny Block transaction with an error page
drop Close network connection
pass Do not block, go to the next rule
pause Pause for a period of time, then execute allow.
proxy Proxy request to a backend web server
redirect Redirect request to some other web server
# FLOW
chain Connect two or more rules into a single logical rule
skip Skip over one or more rules that follow
skipAfter Skip after the rule or marker with the provided ID
Others..
#METADATA, #VARIABLE, #LOGGING, #SPECIAL, #MISC